
Try 3D scene stickers for relaxing DIY fun today
You discover endless creativity with 3D scene stickers. Each set lets you build miniature worlds using safe, high-quality materials. You feel the calming effect as you place each piece and watch your scene take shape. These stickers suit both beginners and experienced DIY fans. Imagine the satisfaction of completing a tiny shop or cozy room. If you want guidance, a 3d scene stickers tutorial video can help you start your next relaxing project.
Key Takeaways
-
3D scene stickers let you create detailed miniature worlds using safe, durable materials that last.
-
Assembling these stickers helps reduce stress and promotes mindfulness through focused, hands-on activity.
-
You can personalize your projects by mixing themes, adding accessories, and arranging pieces your way.
-
Kits suit all skill levels and ages, making them perfect for solo relaxation or fun group activities.
-
Starting is easy with clear instructions, helpful tools, and online tutorials to guide your creative journey.
3D Scene Stickers Explained
Features and Materials
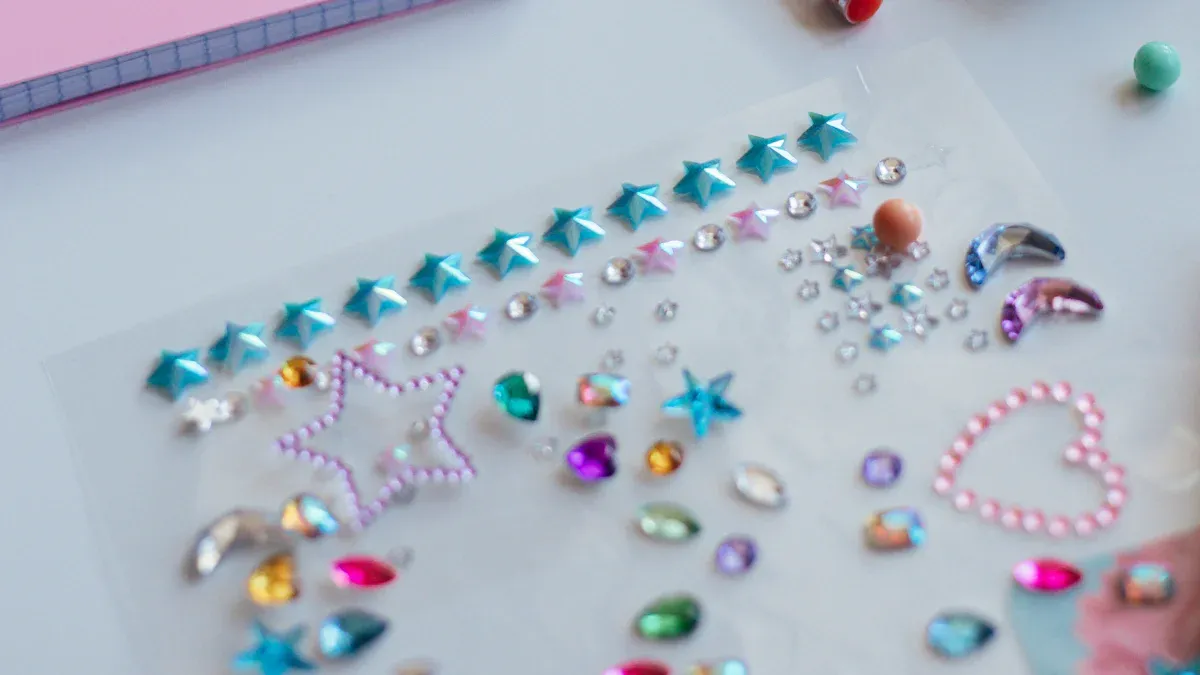
You experience a unique blend of creativity and craftsmanship with 3D scene stickers. These stickers stand out because they create a layered, three-dimensional effect. Each piece fits together to form a miniature scene that feels immersive and lifelike. You work with elements that pop off the surface, giving your finished project depth and realism.
Manufacturers use durable, non-toxic paper to ensure your safety during every project. The coated surface of each sticker resists tearing and holds up well to repeated handling. This design choice means you can enjoy assembling and rearranging your scenes without worrying about wear and tear. You benefit from materials that meet high safety standards, so you can focus on your creative process with peace of mind.
Tip: Choose kits that highlight their use of safe and long-lasting materials. This ensures your projects remain vibrant and intact over time.
Popular Themes
You find a wide range of themes when you explore 3D scene stickers. Many kits feature charming houses, bustling shops, or cozy cafes. Travel-inspired sets let you recreate famous landmarks or dream destinations. Some collections focus on relaxing settings, such as reading nooks, gardens, or peaceful bedrooms.
-
Popular themes include:
-
Miniature houses and apartments
-
Bookstores, bakeries, and flower shops
-
Travel scenes like cityscapes or iconic monuments
-
Cozy corners, libraries, and studios
-
You select a theme that matches your interests or mood. This variety allows you to personalize each project and express your unique style. You might even combine different sets to create a custom scene that tells your own story.
Benefits for Relaxation
Stress Relief
You experience a calming effect when you assemble 3D scene stickers. The process feels similar to other hands-on crafts, such as model building or scrapbooking. You focus on each piece, which helps you clear your mind and reduce daily stress. The repetitive motion of placing stickers encourages you to slow down and enjoy the moment. Many DIY enthusiasts find that this activity promotes mindfulness. You can use this time to disconnect from screens and recharge your mental energy.
Note: Taking short breaks during assembly can help you maintain focus and prevent fatigue.
Creativity and Personalization
You unlock your creative potential with every project. 3D scene stickers allow you to design miniature worlds that reflect your personality and interests. You choose colors, arrange elements, and even combine different kits for a custom look. This freedom supports creative expression and gives you a sense of accomplishment. You can experiment with layouts or add your own touches to make each scene unique.
-
Ways to personalize your project:
-
Mix and match themes
-
Add small accessories or props
-
Create custom backgrounds
-
You gain satisfaction from seeing your ideas come to life in a tangible form.
For All Ages
You do not need advanced skills to enjoy 3D scene stickers. The kits suit beginners and experienced DIY fans alike. You can work alone for quiet relaxation or invite friends and family to join you. Many people use these projects for group activities, team building, or family bonding. The clear instructions and simple assembly steps make the process accessible to everyone.
|
Skill Level |
Suitable For |
|---|---|
|
Beginner |
First-time users |
|
Intermediate |
Hobbyists |
|
Advanced |
Experienced crafters |
You find that 3D scene stickers offer a relaxing and rewarding experience, no matter your age or skill level.
Getting Started
Choosing a Kit
You begin your journey with 3D scene stickers by selecting a kit that matches your interests and skill level. Many kits offer a range of themes, from cozy bookshops to vibrant cityscapes. You should consider the complexity of each kit. Some sets include only a few large pieces, while others feature dozens of tiny elements for a more intricate build.
When you choose your first kit, review the following factors:
-
Theme: Pick a scene that excites you. Popular options include home interiors, travel destinations, and seasonal displays.
-
Difficulty Level: Look for kits labeled as beginner, intermediate, or advanced. Beginners benefit from simpler designs with fewer layers.
-
Included Materials: Check if the kit provides all necessary tools, such as tweezers or a background board.
-
Instructions: Ensure the kit comes with clear, step-by-step guidance. Visual diagrams or video links add extra support.
Tip: Read customer reviews before purchasing. Other DIY enthusiasts often share helpful insights about kit quality and assembly experience.
How to Start
You set yourself up for success by preparing your workspace and organizing your materials. Follow these steps to start your first 3D scene sticker project:
-
Unpack the Kit
Lay out all pieces on a clean, flat surface. Group similar items together for easy access. -
Review the Instructions
Read through the guide or watch any included tutorial videos. Familiarize yourself with the assembly order. -
Prepare Your Tools
Gather any additional tools you might need, such as tweezers, a craft knife, or a ruler. -
Start with the Background
Attach the base layer or background first. This foundation supports the rest of your scene. -
Layer the Stickers
Place larger elements before adding smaller details. Press each sticker firmly to ensure it stays in place. -
Adjust and Personalize
Step back occasionally to check your progress. Rearrange pieces if needed to achieve your desired look. -
Finish and Display
Once complete, display your scene on a shelf, desk, or in a shadow box.
Note: Take your time with each step. Rushing can lead to misplaced pieces or frustration.
DIY Tips
You enhance your experience with a few expert strategies. These tips help you achieve professional results and enjoy the creative process:
-
Watch Tutorial Videos
Many brands offer online tutorials. These videos demonstrate techniques and provide inspiration for your own designs. -
Use Proper Lighting
Good lighting helps you see small details and prevents eye strain during assembly. -
Organize Small Pieces
Use small containers or trays to keep tiny stickers sorted and prevent loss. -
Experiment with Layouts
Before sticking pieces down, arrange them loosely to test different compositions. -
Share Your Work
Join online communities or social media groups for 3D scene stickers. Sharing your finished scenes connects you with other DIY fans and sparks new ideas.
|
Tip |
Benefit |
|---|---|
|
Watch tutorials |
Learn new techniques |
|
Organize pieces |
Prevent loss and confusion |
|
Good lighting |
Reduce mistakes, eye comfort |
|
Share creations |
Gain feedback, inspiration |
Pro Tip: Keep leftover stickers and accessories. You can use them in future projects or combine them for custom scenes.
You build confidence and skill with each project. Over time, you develop your own style and discover new ways to enjoy 3D scene stickers.
Creative Uses

3D Scene Stickers in Crafts
You can elevate your craft projects by adding dimension and personality with these stickers. Many DIY enthusiasts use them to enhance journals, scrapbooks, and planners. You might create a travel diary with layered cityscapes or decorate a memory book with miniature rooms and shops. These stickers also work well for card making and shadow box displays. You can experiment with layouts before sticking pieces down, which gives you flexibility and control over your final design.
Tip: Arrange your stickers on a separate sheet first to test different compositions before applying them to your project.
Decor and Gifts
You can transform small spaces in your home with these miniature scenes. Place finished projects on shelves, desks, or in glass frames to add a touch of charm to any room. Many crafters use these stickers to personalize gifts. You might design a custom greeting card, decorate a gift box, or create a unique keepsake for a friend. These handmade touches show thoughtfulness and creativity, making your gifts stand out.
|
Decor Idea |
Where to Display |
|---|---|
|
Framed mini scene |
Entryway, bedroom |
|
Shadow box display |
Living room, office |
|
Gift embellishment |
Party favors, boxes |
Family and Learning
You can use these stickers for meaningful family projects and educational activities. Many educators and parents report that students and children engage deeply when they build personalized 3D environments. You can narrate stories, summarize books, or teach concepts by creating scenes together. This hands-on approach encourages critical thinking, creativity, and collaboration. You also support social-emotional learning as you work together and share ideas. These projects require minimal preparation, so you can focus on exploring and creating as a team.
Share your finished scenes on social media to inspire others and connect with fellow DIY enthusiasts. You might discover new techniques or spark ideas for your next project.
You gain both relaxation and creative satisfaction when you work on these miniature scenes. Each project lets you express your style and enjoy a mindful break from daily routines. Share your finished creations with friends or family to inspire others. Choose a kit that excites you and start your next DIY adventure today. Your next favorite hobby could begin with 3D scene stickers.
FAQ
What tools do you need for 3D scene sticker kits?
You usually need only basic tools. Most kits include everything required. Tweezers help with small pieces. Good lighting improves accuracy. Some crafters use a craft knife for precise adjustments.
Tip: Organize your workspace before you begin for a smoother experience.
Can you reuse 3D scene stickers after assembly?
Most 3D scene stickers use strong adhesive. You cannot reuse them once applied. Some premium kits offer repositionable stickers. Always check the product description for details.
How long does it take to complete a typical kit?
Completion time depends on the kit’s complexity. Simple scenes may take 30 minutes. Detailed projects can require several hours. You set your own pace and enjoy the process.
|
Kit Type |
Estimated Time |
|---|---|
|
Beginner |
30–60 minutes |
|
Intermediate |
1–2 hours |
|
Advanced |
2+ hours |
Are 3D scene stickers safe for sensitive skin?
Manufacturers use non-toxic, skin-friendly materials. You should check for allergy information on the packaging. If you have sensitive skin, wash your hands after use and avoid direct contact with adhesives.