How to Make 3D Miniature Scenes?
Share
Creating 3D miniature scenes stickers is a unique and exciting way to add dimension and charm to your DIY projects. These intricate, small-scale designs let you build detailed, imaginative worlds on a tiny canvas. Whether you’re crafting a garden scene, an urban landscape, or a whimsical forest, the possibilities are endless with 3D miniature scenes stickers.
The beauty of these stickers lies in their ability to provide an instant three-dimensional effect without needing advanced crafting skills or materials. With just the right tools, patience, and creativity, you can create miniature scenes that feel like they’ve jumped out of a storybook. In this article, we’ll guide you through the process of making your own 3D miniature scenes stickers, step by step, so you can craft beautiful, personalized designs with ease.
Essential Tools and Materials for Making 3D Miniature Scenes Stickers
Before diving into the creation process, it’s essential to gather the right tools and materials for making your 3D miniature scenes stickers. Having everything ready will streamline your work and ensure that your scene turns out as planned. Here's what you'll need:
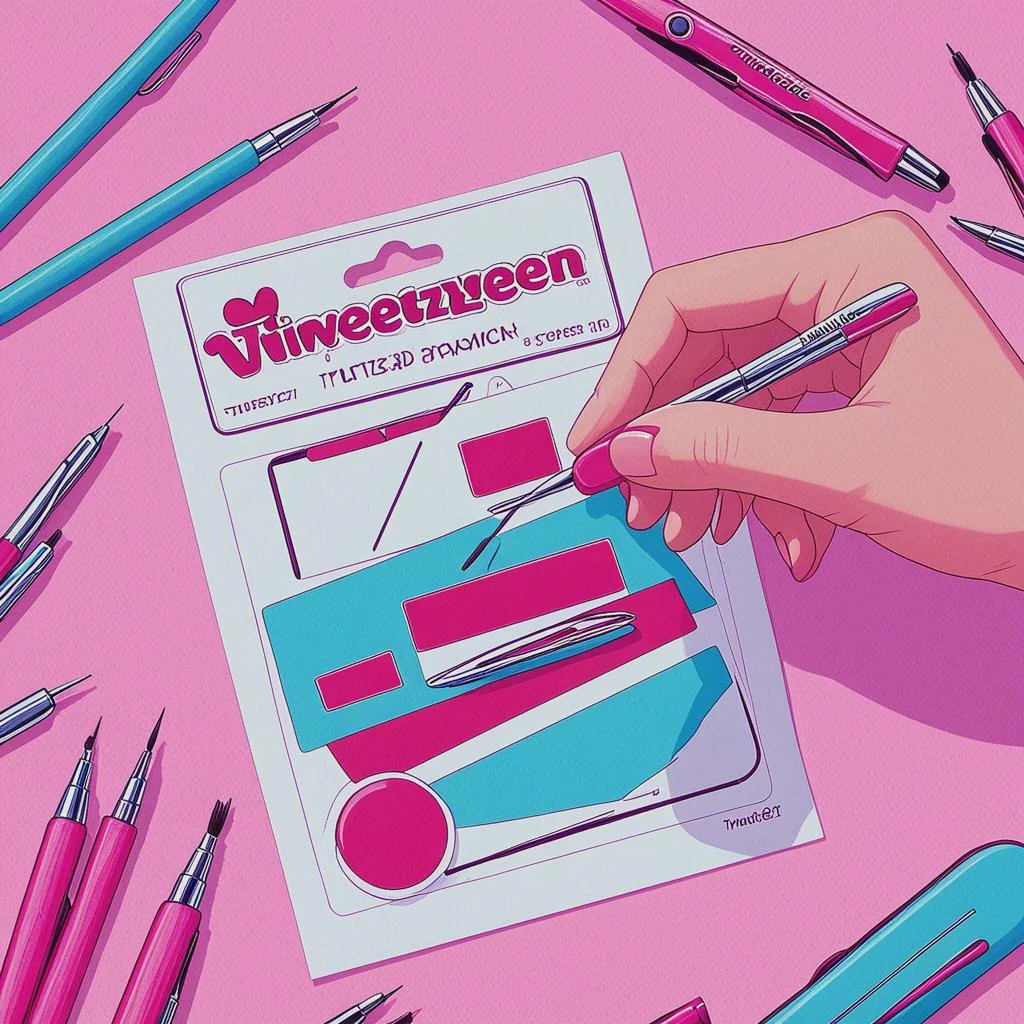
1. Tools for Precision
-
Tweezers: These fine-tipped tools are indispensable when working with small, delicate elements. They help you precisely pick up and place the pieces of your 3D miniature scenes stickers without smudging or damaging the stickers.
-
Craft Knife or Scissors: You’ll need these tools for trimming and cutting around stickers or other materials. A sharp craft knife helps you make fine adjustments for the perfect cut.
-
Ruler or Measuring Tape: A ruler ensures that the stickers are placed symmetrically and in the right positions, helping to create a balanced scene.
-
PET Backing Material: This flexible backing material provides a surface for your stickers to stick to, offering support and stability to your mini scene while allowing layers to remain properly spaced.
-
Finger Wraps: These help you press down the stickers without leaving fingerprints or unwanted smudges on the surface.
2. Materials for the Scene
-
3D Miniature Scenes Stickers: The core of your creation! These stickers are designed to bring depth and life to your scene. They come in various themes such as nature, architecture, animals, and more. Choose the ones that match the vibe of your miniature world.
-
Miniature Accessories: To enhance your design, you can include additional elements like tiny plants, figurines, or furniture. These accessories help add character and realism to your 3D miniature scenes.
-
Adhesives: A reliable adhesive is essential to secure your stickers and accessories in place. Choose one that dries clear and is flexible enough to allow for slight adjustments as you build your scene.
Step-by-Step Guide to Making 3D Miniature Scenes Stickers
With your tools and materials ready, it’s time to start bringing your 3D miniature scenes stickers to life. Follow these steps to create your very own detailed, miniature world.
1. Prepare Your Workspace and Materials
Start by setting up a clean, flat surface with good lighting. This will make the process easier, especially when handling small pieces. Having ample space to work will prevent your tools and materials from getting in the way.
Once your workspace is ready, it's time to prepare your 3D miniature scenes stickers. Use tweezers to gently remove any excess material or waste around your stickers. This ensures that you can easily pick up and place the stickers without any clutter or unnecessary material.
Make sure you have your PET backing material ready. If you’re using a display frame, place the backing into the frame first. Otherwise, you can work directly on a flat, sturdy surface, like a piece of cardboard or thick paper.
2. Set Up the Base of the Scene
Now it’s time to set up the base. For scenes with a defined background, apply the largest elements first—these could be structures like trees, buildings, or large pieces of furniture. The background forms the foundation for the rest of the scene, so it’s important to get it right.
As you place the background stickers, press them firmly but gently to avoid creasing. Make sure each sticker is aligned properly before securing it down to maintain a clean, professional look.
3. Stick Layer by Layer
To create depth in your 3D miniature scenes stickers, layering is key. Start by placing the innermost elements of the scene. For instance, if you’re making a garden, place larger objects like trees and bushes at the back of the scene.
Once the background elements are in place, gradually work your way outwards. This might include adding smaller items like flowers, animals, or furniture. Ensure each layer is secured properly and spaced correctly to create the illusion of depth and dimension. You can also use a ruler to make sure everything is positioned symmetrically.
Layering stickers properly is crucial to making your scene look realistic. Don’t rush this process—take your time to make sure each piece is placed thoughtfully.
4. Refining the Details
Once the primary layers are in place, it’s time to focus on the details. Small touches like miniature figurines, tiny accessories, and delicate plants can elevate your 3D miniature scenes stickers. These details help to add realism and charm to your scene, making it feel complete.
Use tweezers to carefully place these tiny elements, ensuring they are well-positioned and properly adhered to the backing. This is also the time to add any finishing touches, such as extra shading or background highlights, to make the scene more visually dynamic.
5. Final Touches and Preservation
After everything is in place, give your scene one last look to check for any loose stickers or uneven areas. Once satisfied with the arrangement, allow the scene to fully dry before moving it or adding any final touches.
To preserve your 3D miniature scenes stickers, you might want to consider sealing the scene with a thin layer of clear, protective coating. This will keep your creation safe from dust and damage.
If you’re using a display box, make sure it’s sealed properly to protect the delicate layers from getting disturbed. Keep your scene in a cool, dry place to prevent any fading or damage.
Conclusion
Crafting 3D miniature scenes stickers is a fun and creative way to add a touch of magic to your DIY projects. By using the right tools, taking your time with layering, and refining your scene with small details, you can create stunning miniatures that captivate and inspire. Whether you’re a beginner or a seasoned crafter, this guide should give you all the tips and tricks you need to build your own miniature world. So, gather your materials and start building your tiny masterpiece today! Happy crafting!